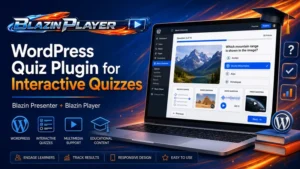
If you want to get the Blazin Player WordPress plugin working quickly, the good news is that the setup is straightforward. The basic flow is simple: install the plugin, activate your license, export a presentation from Blazin Presenter, import it into Blazin Player, and then place it on your site with either a shortcode or Elementor.
Once that is done, you can manage a full library of presentations from one dashboard, update designs without re-editing posts, and control access globally or presentation by presentation.
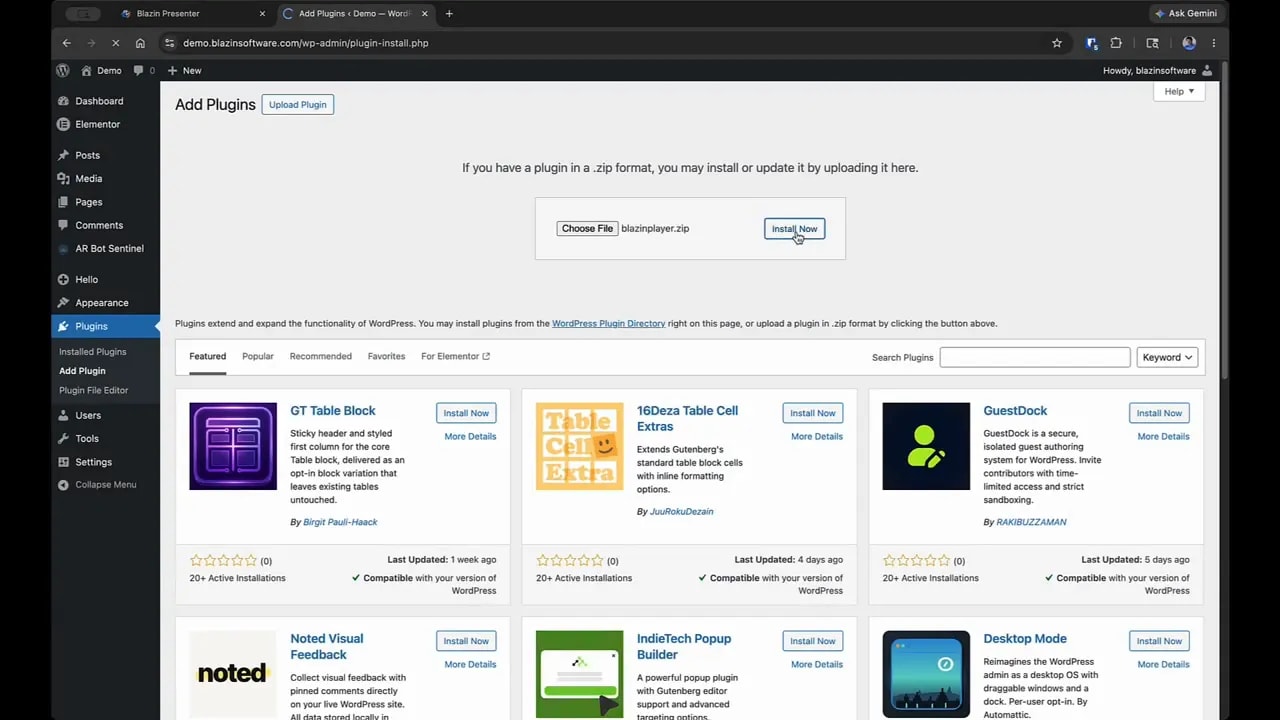
Step 1: Install the Blazin Player plugin in WordPress
Start inside your WordPress admin area.
- Go to Plugins.
- Click Add Plugin.
- Choose Upload Plugin.
- Select the ZIP file you downloaded for Blazin Player.
- Install it, then activate it.
After activation, you should see a new Blazin Player panel in the left-hand WordPress menu.
Step 2: Activate your license
Before importing anything, activate the plugin license.
- Open the Blazin Player menu.
- Go to License.
- Paste in the license key that was emailed to you.
- Click Submit.
Once the key is accepted, the plugin is ready to use.
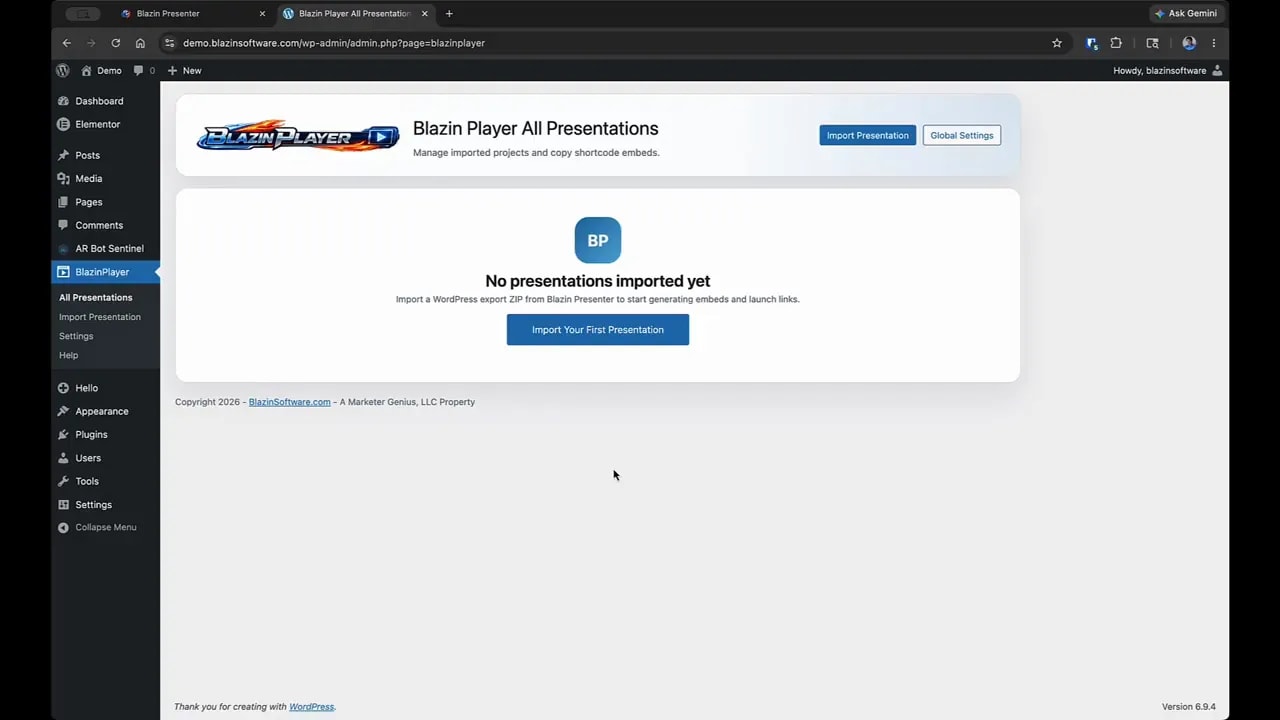
Step 3: Understand the presentation library
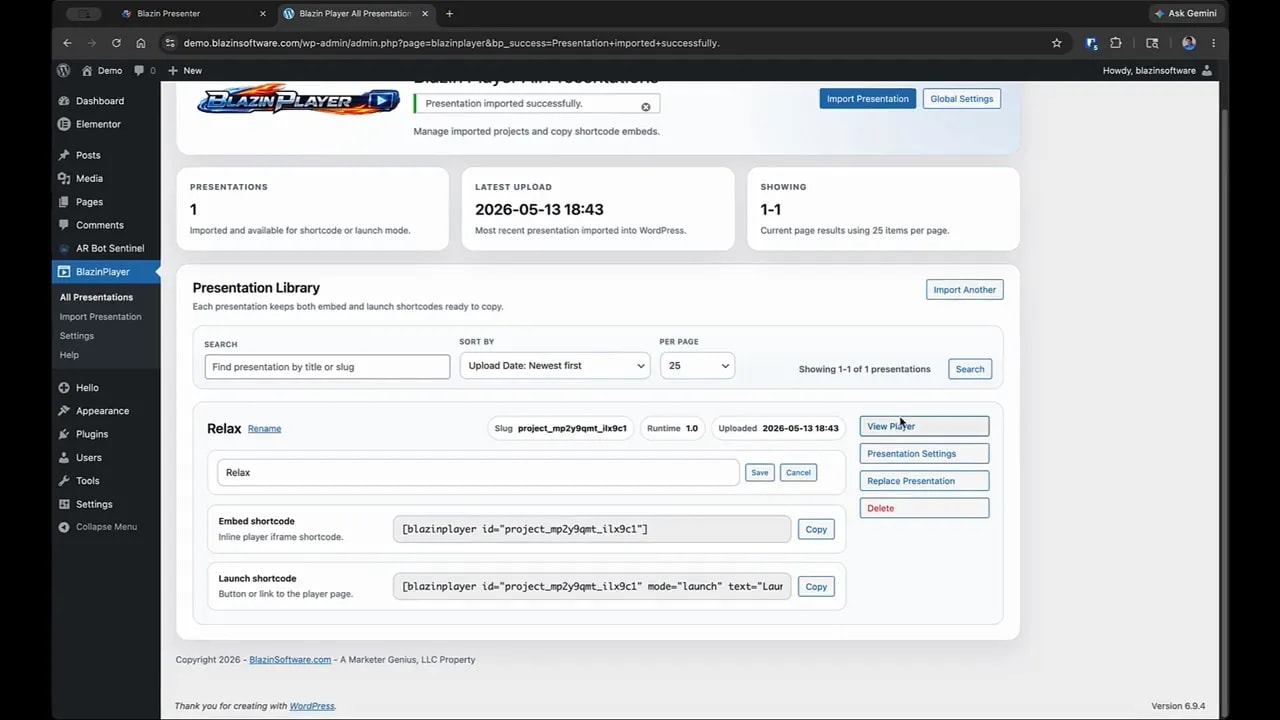
Next, go to All Presentations. This is the central library for your content.
This area is important because it is where you manage everything you import. You are not limited to one presentation. You can upload dozens or even hundreds and keep them organized from a single control panel.
That centralized library is what makes this Blazin Player WordPress plugin workflow so practical. Instead of hunting through pages and posts every time something changes, you manage the presentation itself in one place.
Step 4: Export a presentation from Blazin Presenter
If your library is empty, that is expected. Presentations come from Blazin Presenter.
Inside Blazin Presenter:
- Open the File menu.
- Select Export WordPress.
- Save the exported file somewhere easy to find on your computer.
That exported file is what you will import into the WordPress plugin.
Step 5: Import your presentation into Blazin Player
Back in WordPress, open Blazin Player and choose Import Presentation.
You will typically see two import options:
- Create new presentation
- Replace existing (optional)
If this is your first import, use Create new presentation.
If you already imported a presentation before and want to update it, Replace existing is extremely useful. It lets you refresh the presentation file in the library without having to manually edit the WordPress pages or posts where it is already being used.
Choose your exported file and import it.
Once the upload finishes, the presentation appears in your library, and you can use View Player to confirm that it loaded correctly.
Step 6: Configure global player settings
Before placing presentations around your site, it is worth understanding the difference between global settings and presentation-specific settings.
Global settings control the general look and access behavior of the player, especially when using shortcodes.
Here are the main things you can control globally:
- Button appearance
- Player styling
- Access permissions
For access, you can choose one of these approaches:
- Public so anyone can view presentations
- Require login so only logged-in users can view them
- Require roles so only users with selected WordPress roles can access them
If you want everything open by default, leave it on Public. If your site has member-only or internal content, role-based control is built in.
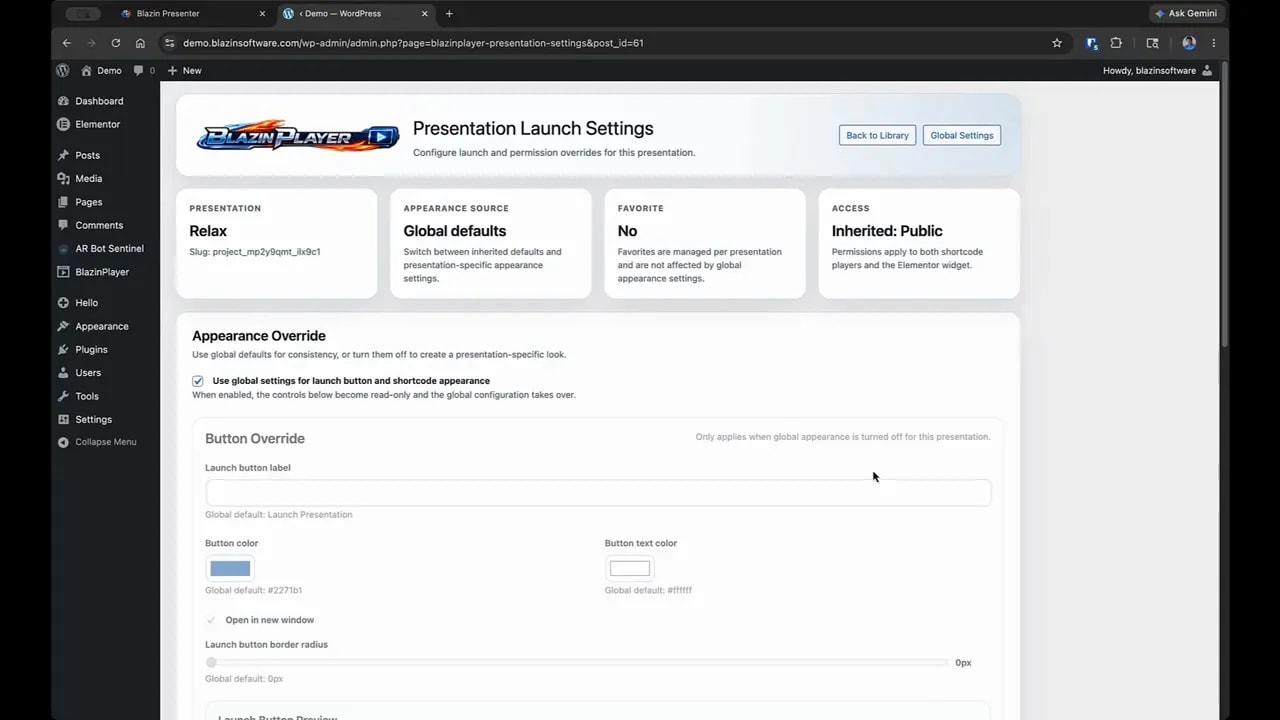
Step 7: Override settings for an individual presentation
Each item in your library has its own Presentation Settings area. This is where you can override the global defaults for that one presentation.
You can change things like:
- Button color
- Button text
- Button corner radius
- Player width and height
- Rounded player corners
- Shadow styling
- Favorite status for easier library management
You can also override access on a per-presentation basis. For example, you might keep your global setting public but lock down one specific presentation to logged-in users or a certain role.
This setup gives you a nice balance: broad defaults for speed, and individual overrides when needed.
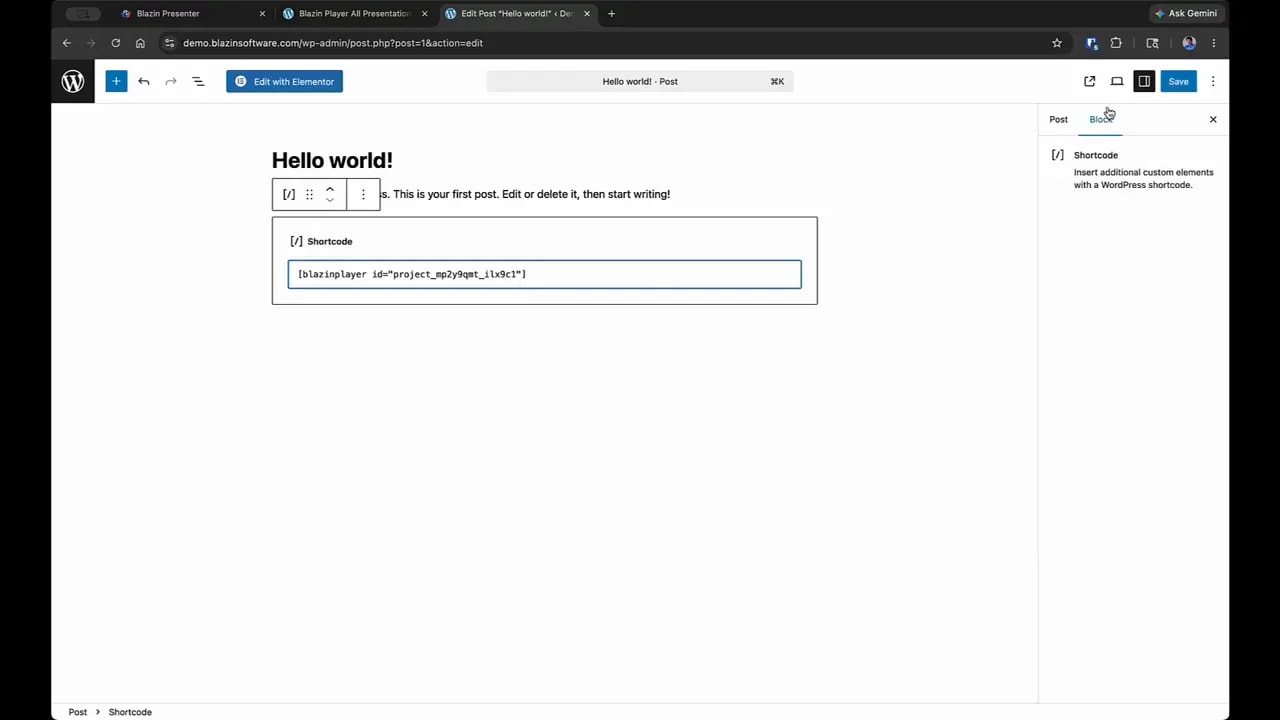
Step 8: Add a presentation to a post or page with a shortcode
Blazin Player provides two shortcode options in the presentation library:
- Embed shortcode
- Launch shortcode
Both are designed to be copied and pasted into a WordPress post or page. In the demo, the embed shortcode is dropped directly into a standard Gutenberg post, and the player appears immediately on the front end.
The process is simple:
- Copy the shortcode from the presentation library.
- Open the post or page you want to edit.
- Paste the shortcode into the content area.
- Save or update the post.
- Refresh the live page.
That is enough to display the presentation inside the post.
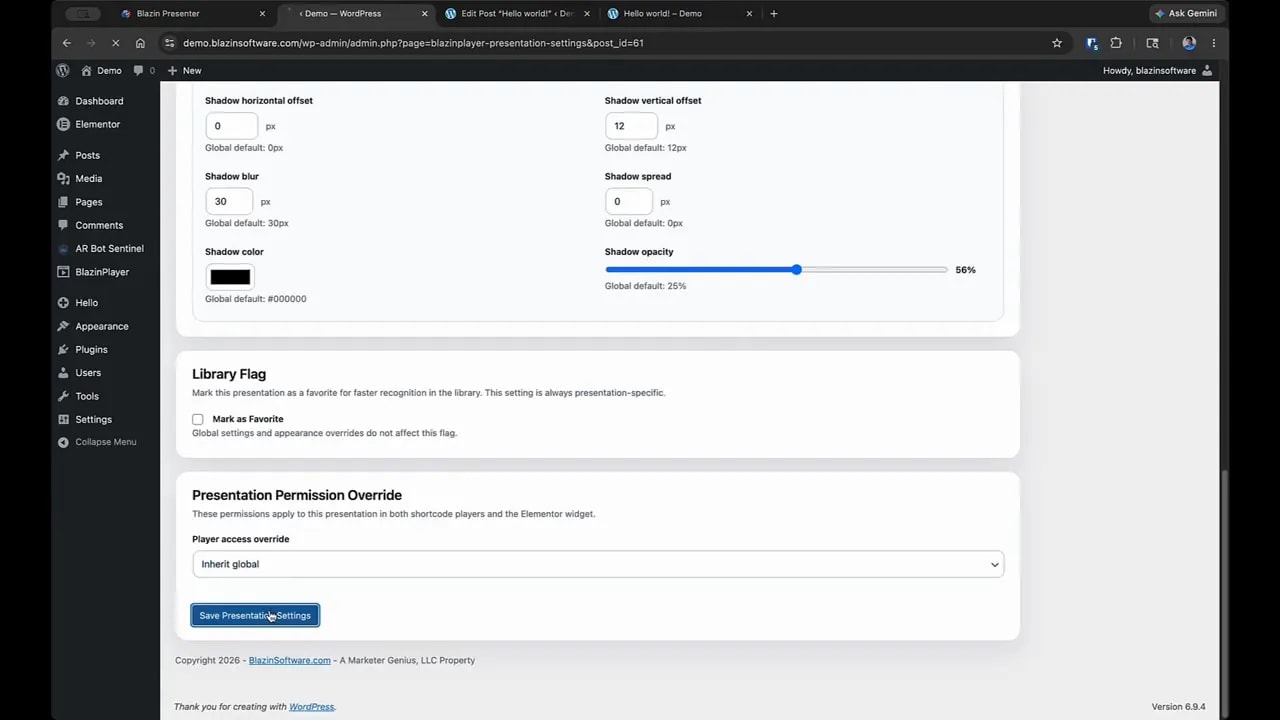
Step 9: Update the player design without editing the post again
One of the most useful parts of this Blazin Player WordPress plugin setup is that styling changes can be handled at the presentation level.
For example, if you go back into the presentation settings and add:
- Rounded corners
- A shadow
- A darker visual style
You do not need to reopen the post and replace the shortcode. Just save the presentation settings and refresh the page. The player updates automatically wherever that presentation is embedded.
That is a big time saver, especially if the same presentation appears in multiple places on your site.
Step 10: Add Blazin Player inside Elementor
If you use Elementor, there is a dedicated widget for Blazin Player.
To add it:
- Open your page in Edit with Elementor.
- Search the widgets panel for Blazin.
- Drag the Blazin Player widget onto the page.
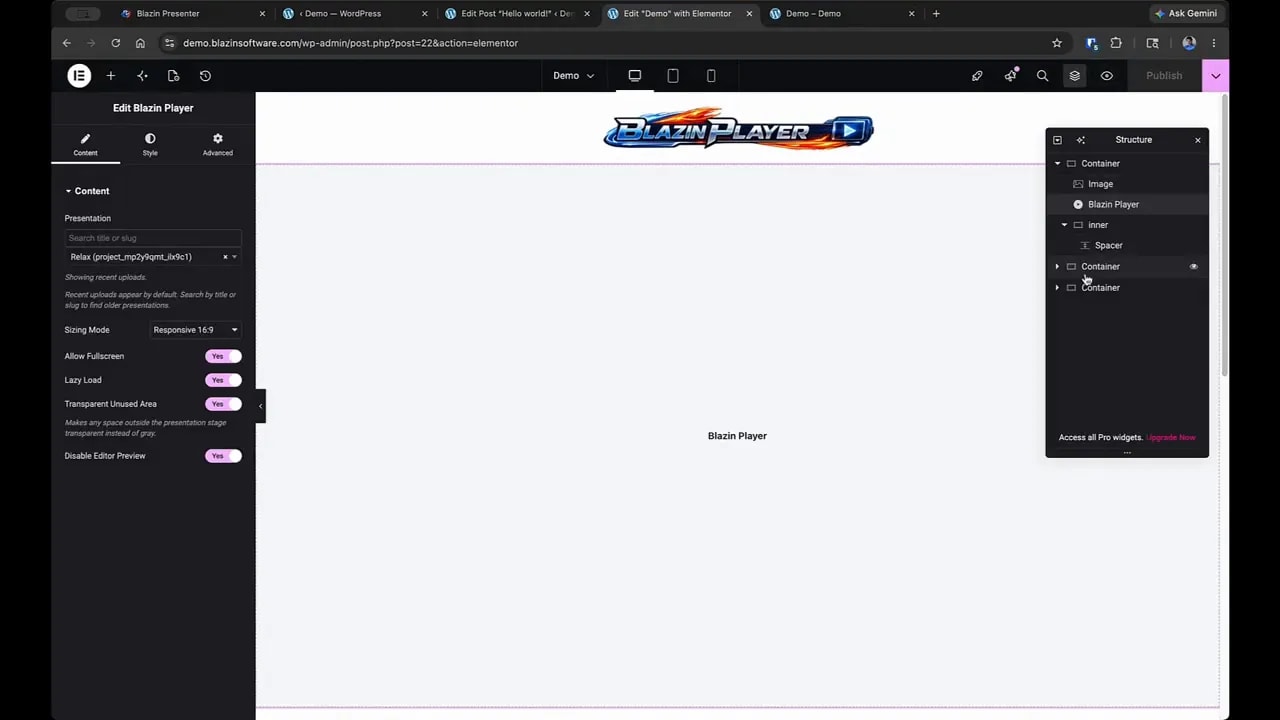
- Select the presentation you want to display.
You can choose the presentation in two ways:
- Search by title or slug
- Use the dropdown list of imported presentations
Once selected, the widget loads a preview so you can confirm you picked the correct presentation. After that, you can turn the preview off if you prefer a cleaner editing workspace.
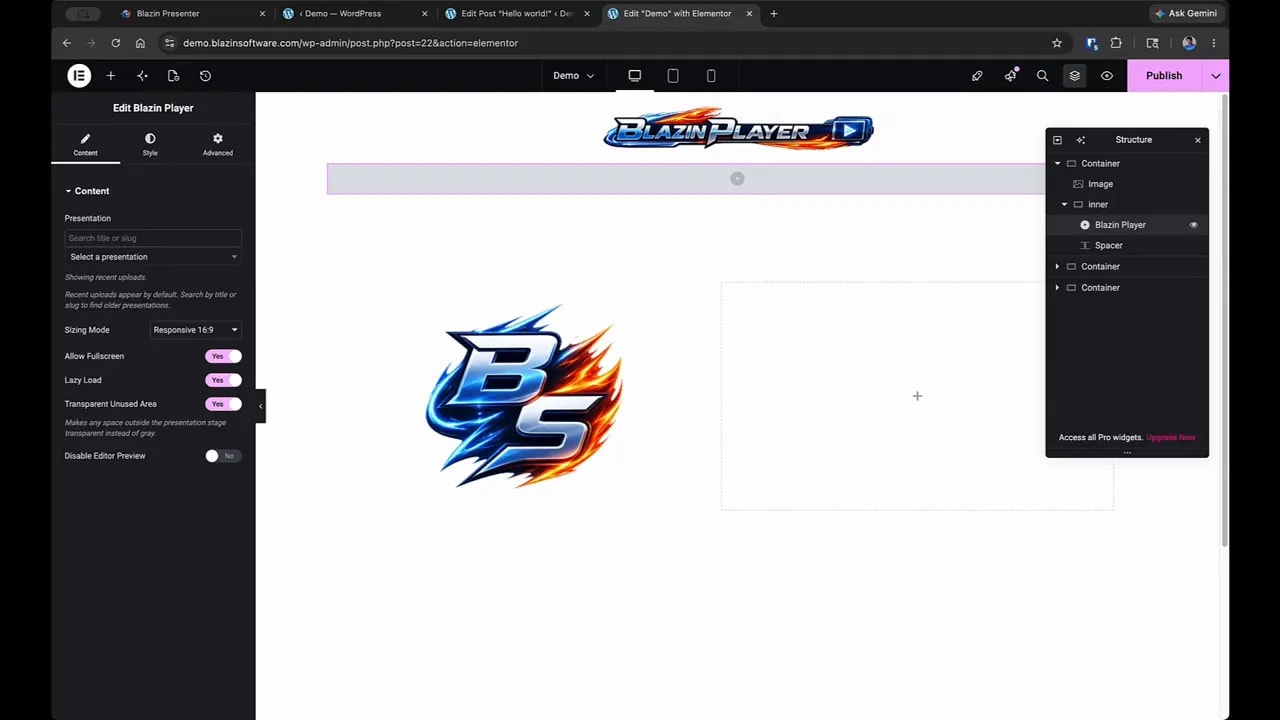
Step 11: Use Elementor widget options the smart way
The Elementor widget includes a few practical settings.
Allow Full Screen
This applies to the iframe behavior. In most cases, it is best to leave this enabled.
Lazy Load
If the player sits below the initially visible area of the page, lazy loading can prevent it from loading until someone scrolls down to it. That can help reduce unnecessary bandwidth usage.
Transparent unused area
If you are using rounded corners and notice an unwanted gray area around the edges, leaving this enabled helps clean that up.
Size mode
The recommended choice is Responsive. That allows the player to adapt naturally to the space provided by the Elementor container.
Step 12: Let responsive sizing do the work
Responsive mode is one of the most important settings when placing a presentation in Elementor.
Here is what happens:
- If you drop the widget into a full-width container, the player expands to fill that wider area.
- If you move it into a narrower column or right-side container, the player shrinks to fit that space.
- The height adjusts automatically to maintain a 16:9 ratio.
That means you usually do not need to manually calculate dimensions. The container controls the available width, and the player scales itself accordingly.
This is exactly why responsive mode is the default recommendation for the Blazin Player WordPress plugin workflow in Elementor.
Step 13: Style the Elementor player with rounded corners and shadows
Inside Elementor, you can also apply styling directly through the widget settings. A common combination is:
- Rounded radius for softer corners
- Shadow for visual separation from the page background
You can adjust the shadow offset to push it below the player, to the sides, or in a more balanced direction depending on the design you want.
After publishing the page, those styling updates appear immediately on the live site.
Step 14: Manage updates efficiently as your library grows
Once you start using multiple presentations, a few habits make management much easier:
- Use the library as your single source of truth
- Mark frequently updated presentations as favorites
- Use Replace existing when updating exported files from Blazin Presenter
- Set sensible global permissions first, then override only when necessary
This approach keeps your WordPress site cleaner and avoids repetitive edits across posts and pages.
FAQ
Yes. Individual presentation settings let you override global defaults. You can adjust items such as button color, button text, corner radius, player width and height, rounded corners, shadow styling, and access rules for a specific presentation.
Yes. Elementor is optional. You can use Blazin Player with standard WordPress posts and pages by copying the provided shortcode and placing it inside a shortcode block or content area.
The embed shortcode places the presentation directly inside a WordPress post or page. The launch shortcode is used when you want visitors to open the presentation through a launch-style button or player experience instead of displaying it directly in the page content.
Replace existing lets you update a presentation that has already been imported into Blazin Player. This is useful when you revise a project in Blazin Presenter and want the updated version to appear everywhere it is already used, without replacing shortcodes or rebuilding pages manually
The presentation library lets you manage your imported content in one place instead of hunting through individual WordPress pages and posts every time something changes. This makes updates, styling, access control, and organization much easier as your content library grows.
Yes. Blazin Player includes a central All Presentations library where you can manage multiple imported presentations from one dashboard. This is useful if you have several lessons, demos, training modules, or interactive projects on the same WordPress site.
Lazy loading delays player loading until the player area is closer to being visible on the page. It can help save bandwidth when the player appears farther down the layout.
Responsive is usually the best option. The player will adapt to the width of its container and automatically keep the proper 16:9 ratio.
Yes. You can paste a shortcode into a Gutenberg post or page, or use the dedicated Blazin Player widget inside Elementor.
Yes. You can make presentations public, require users to be logged in, or restrict access by WordPress role. These rules can be applied globally or overridden for individual presentations.
Global settings control the default look and access behavior for the player across your site. Presentation settings let you override those defaults for one specific presentation.
Yes. You can replace an existing presentation in the library or change its settings there. Once updated, the changes appear anywhere that presentation is already embedded, without manually editing each post or page.
Create or edit the presentation in Blazin Presenter, then use File > Export WordPress. Save that file to your computer, go into WordPress, open Blazin Player, and import the exported file into your presentation library.
YouTube video going over the exact same content as this page on setting up Blazin Player WordPress Plugin
Final thoughts
The overall setup for Blazin Player WordPress plugin is exactly what it should be: import, drag and drop, or copy and paste.
You install the plugin, activate the license, export from Blazin Presenter, import into WordPress, and then choose how you want to place the presentation. If you like working with shortcodes, that path is quick. If you prefer Elementor, the widget makes placement just as easy.
From there, the real advantage is centralized control. You can manage presentation updates, styling, responsiveness, and access permissions without constantly revisiting each page on your site. That makes it a practical solution whether you are embedding one presentation or building a full content library inside WordPress.